Have you been to Daiso? I'm not a regular but I'm a fan. Since everything's $2, it's easy to get carried away and buy stuff that I don't need. Like the printed ribbon below and the flexframe. Again, I don't remember when I bought these so I can't tell you if they are still available at Daiso. You could always try :-)
So, with these 2, I decided to make this into a tutorial, as a giveback for those times when I've learnt how to sew from others' blogs, LOL! Do email me if the instructions are not clear.
I used 3 different fabrics - plain green for the exterior, checks for the top and florals for the lining. Cotton Ribbon and Spring Frame from Daiso.
And made this.
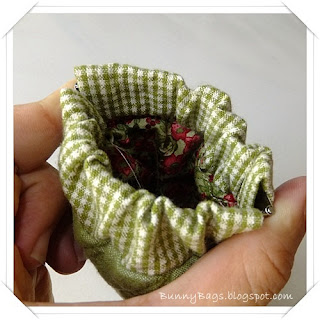
Which opens like this.
Cut 1 piece for exterior, 1 for lining and 2 smaller for the top. I didn't measure 'cos I'm not using a pattern. Estimate using the spring frame, as in, the width of the top (checked fabric) is about a third longer than the length of the spring frame.
I quilted the exterior fabric and sewed on the cotton ribbon. You can omit this if you wish.
Fold in the sides of the top pieces twice and sew the edges.
Fold the sewn top pieces in half and sew with the edges facing top of the exterior piece.
Place the lining on top and sew together. Open up and top-stitch it down like this.
Fold the whole piece in half (exterior to exterior, interior to interior) and sew all 3 sides. One side would be the folded side. Remember to leave a gap for flipping the pouch right side out.
Square the corners and sew. Think tetra pack drinks.
Flip the pouch right side out, sew the gap close and attach the spring frame. Instructions would be with the spring frame packaging.
Have fun!
.jpg)
.jpg)
.jpg)
.jpg)
.jpg)
.jpg)
.jpg)
.jpg)
.jpg)
.jpg)
.jpg)
No comments:
Post a Comment